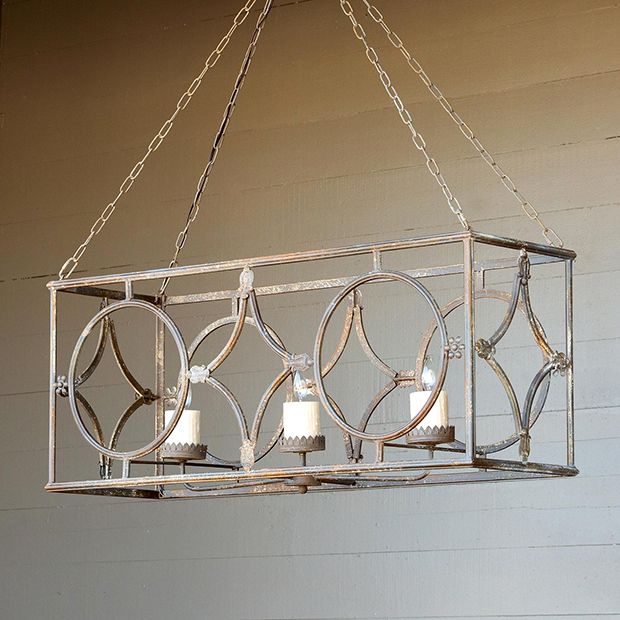
DIY Tips: How to Install & Maintain a Farmhouse Chandelier
You’ve found the perfect farmhouse chandelier for your space, but that’s only the first step. Now, you need to install and then learn how to maintain the chandelier so it stays in top condition. If you’ve never done this before, it can seem overwhelming, but here are a few tips to help you get started.

Share this Image On Your Site
Are you thinking about giving a few of your rooms a facelift with new lighting? You may be like many others who have chosen to put chandeliers in new and unique places or replace fixtures with fresh, new options that match your style and décor. However, you may feel nervous and wonder how to install a farmhouse chandelier.
Therefore, consider these installation tips.
Pre-Installation Preparation
Most chandeliers do not arrive assembled, so open the box and check to make sure that all the parts and fasteners are there, including the mounting strap. Pull out the instructions and start putting your chandelier together. Items like the Farmhouse Transom Chandelier may only have a few steps, while more elaborate chandeliers, such as the Colorful Crystals Mini Chandelier, may take a little more time to put together.
As you read how to install a chandelier, start by stripping three-quarters of an inch of your chandelier wires with a wire stripper and a pair of pliers. Then, turn off your light and allow the bulbs to cool completely.

Remove the Old Fixture
Do not just turn off the light switch. Instead, turn the power off at the breaker. Test the light by turning it on and off before you touch the old fixture. Then, get a sturdy ladder and a friend to hold it steady.
Unscrew the fixture from the ceiling and the wire nuts, but save them. Separate the ceiling and fixture wires, and pay attention to those that you disconnected, especially if you have more than two wires in your ceiling fixture location.
Adjust the New Chandelier Height and Prepare the Chandelier
Chandeliers connect to the ceiling by a chain. However, ceiling heights and the placement of the chandelier differ based on the house and location. Hold the chandelier up to the ceiling and determine how low you want the chandelier to hang. Then, shorten the chandelier chain.
Next, attach the chain to the canopy, or the part of the chandelier that fixes to the ceiling structure. Make sure the nice side of the canopy faces the room and not the ceiling. Next, screw your mounting strap to the outlet box in your ceiling with electrical screws. Then, tighten the nut on the hanging rod and screw on the hanging bracket.
Hang the Chandelier
Connect your chandelier wires to your ceiling wires. The grounding wire is bare and should connect to the grounding screw, which is green, or the ceiling’s ground wire. The neutral wires are white and have ridges, while the black, smooth wires are hot. Connect these wires to their counterparts. Use a wire nut to cover the neutral wires together and the hot wires together.
Install your light bulbs and turn on the power to test the light. Loose connections may trip the breaker and need tightening after you turn the power back off. Next, review how to hang a chandelier.

Attach the canopy to the ceiling plate and screw it on to hang the chandelier. Fix the chain to the ring while supporting the chandelier. Add the swag, like the crystals on elegant accents, chandeliers, and bulbs and give the light a final test.
How To Clean a Chandelier
Whether you're in the market for a new chandelier or you already have an elegant lighting fixture hanging in your home, you must maintain the fixture. When you clean any part of your home's decor, you want to ensure that you don't cause any damage. Fortunately, when you have the correct technique and supplies, cleaning your chandelier can be a breeze.
1. Prepare To Clean
Before you begin the process, prepare your space to clean. Move furniture from under the chandelier and lay down cloth or tarp to catch any dust or dirt that might drop from the fixture. Additionally, ensure that you create a safe environment to start cleaning. For high chandeliers, have a sturdy ladder that ensures all your supplies are within reach.
2. Collect the Supplies
Ensure you have all the necessary supplies to clean the chandelier. Remember that how you clean your chandelier will also depend on the structure's material and paint. Some cleaning supplies for various chandeliers include:
- Dish soap for crystals
- Lemon oil or juice for brass or metal
- Pine oil and vinegar-based cleaning supplies for brass or metal
- Glass cleaner for glass chandeliers
In addition to a cleaner, you should have a duster, bucket or spray bottle and a cleaning cloth.
3. Dust Your Chandelier
Part of how to clean a chandelier is dusting it. If you start to wipe down your chandelier with a cleaner before you dust, you could scratch the material. Likewise, dust tends to stick and pile when you add water. Instead, start cleaning using a duster and remove all dry debris.
4. Turn Off the Power
Whenever you have to clean your lighting fixtures, turn off the power to those fixtures. Ensure the lights are off and unplug your chandelier from the wall. If you want to be extra careful, you can also shut off the electricity in the room you plan to clean.
5. Remove Any Decorations
If your chandelier has any decorative elements, like hanging beads or crystals, you may want to remove those entirely. Some decorations require extra attention, such as a soak in a bucket of warm dish soap. If your chandelier has hanging decorations, you'll find cleaning the frame and fixture more challenging with the accessories hanging in your way.
6. Do Not Spray the Chandelier
Do not spray water or cleaner directly on the chandelier when you start the process. When learning how to clean a chandelier, you may hear that spraying directly onto the fixture can cause the varnish to wear down or otherwise damage the surface. To ensure this doesn't happen, spray the cleaner onto the cloth first.
To begin the process, wipe the metal arms and apply pressure to the crevices to ensure that you remove all of the buildup. When it comes to shiny elements like crystals, allow them to drip dry to avoid ruining the job with your fingerprints.
Next Steps
Now that you know how to install and clean a chandelier, spend time finding the right one for your room. If you need help choosing a chandelier to fit your style, contact the amazing people at Antique Farmhouse or browse our selection today; we're more than happy to help you find the style you're looking for.
Sources:
- https://www.homedepot.com/c/ah/how-to-hang-a-chandelier/9ba683603be9fa5395fab9011d07599f
- https://www.lowes.com/n/how-to/how-to-install-a-chandelier
- https://www.bhg.com/how-to-clean-a-chandelier-7113416
- https://www.lampsplus.com/ideas-and-advice/how-to-clean-a-chandelier/
- https://www.homedit.com/cleaning/cleaning-a-crystal-chandelier/
- https://www.southernliving.com/how-to-clean-chandelier-7556962
- https://www.fromhousetohome.com/how-to-hang-a-chandelier/
- https://www.bhg.com/home-improvement/lighting/installing-a-chandelier-and-dimmer-switch/
- https://www.thespruce.com/how-to-hang-a-dining-room-chandelier-1976284
- https://www.forbes.com/home-improvement/electrical/how-to-install-light-fixture/
- https://www.hgtv.com/lifestyle/real-estate/how-to-install-a-light-fixture


Login and Registration Form